What's New In The 3D Printer World

3 minutes reading time (520 words)
Featured 

Flashing Tronxy X5S Factory Control board USB Cable only

Ok so Scott here again, this time I decided to go ahead and take things to a simple level based off a write up done by Syed Muhammad Shaheryar. I have seen so many comments and issues with people flashing firmware to their factory TronXY X5S control board, now this should work for flashing the firmware on the X3S as well but the firmware I included will need some edit work unlike for the X5S. This Version of Arduino IDE will work just like any other but it can be installed on a thumb drive or SD card  and moved from one computer to the next without having to install anything on that computer. it should also work on other boards but I have not tested it.

To start with Items you will need.          


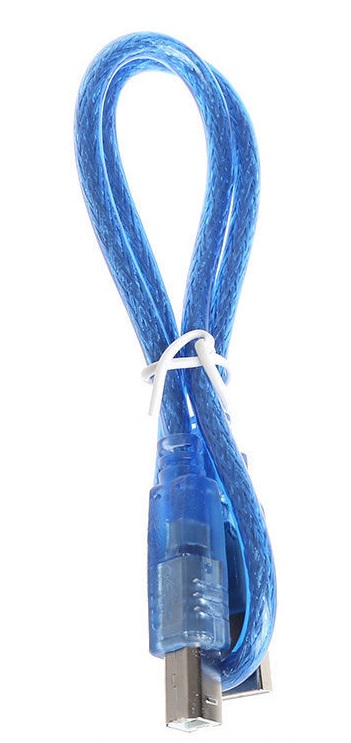
USB cable that came with the printer (or about any others that fit both ends)


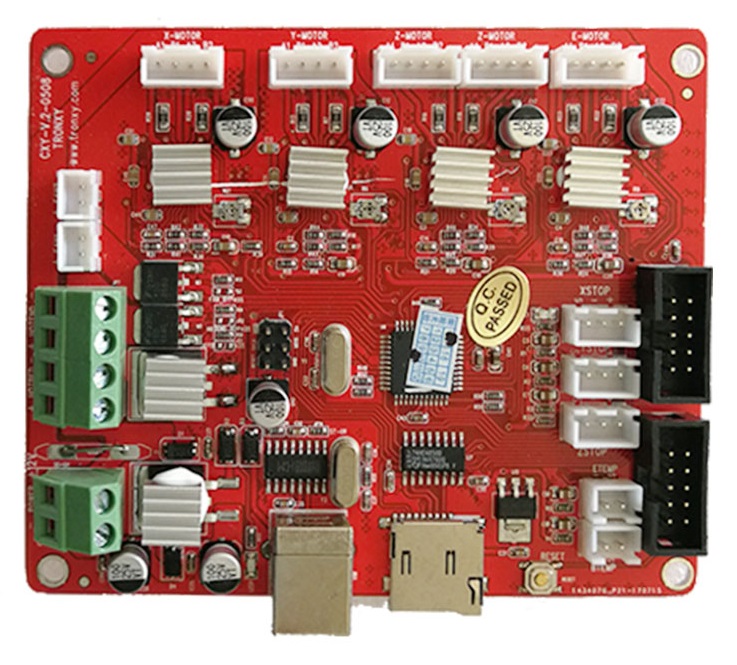
                Tronxy X5S factory control board.


  1. Remove all versions or Adruino IDE if you already have it installed. From this point on you can use this version for all your firmware updates.
  2. Download.

             Down load this zip (165.mb)

File is here

(note I got comments about people getting heating errors so I changed the firmware temp timer in the firmware in this file but it is only the firmware so you still need the above file first) Temp time extended firmware  File is here (please note I updated the first file to include this file as well so this is just here if you already have bootloader and want to use this firmware only)


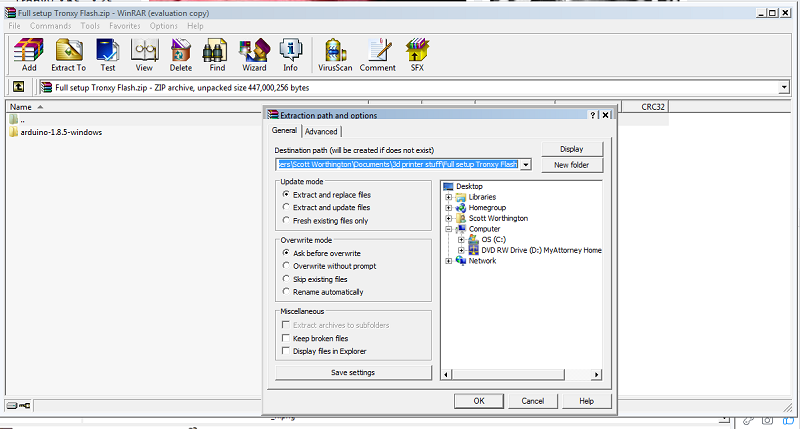
  1. Unzip the file in a location of your choosing. This will install a complete new version of Arduino that is stand alone.


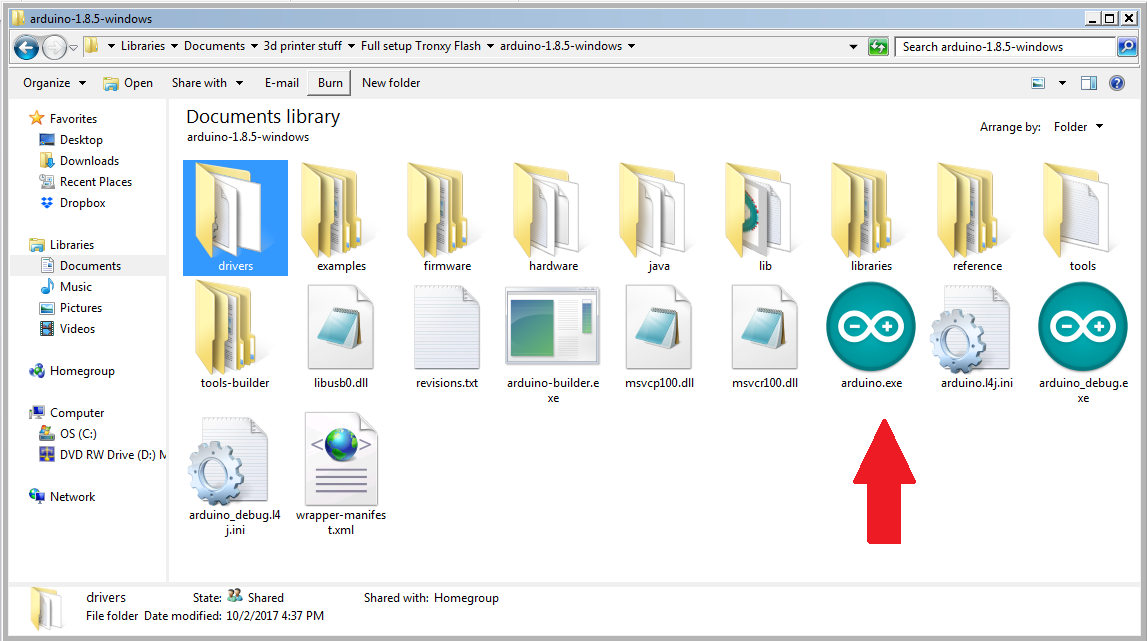
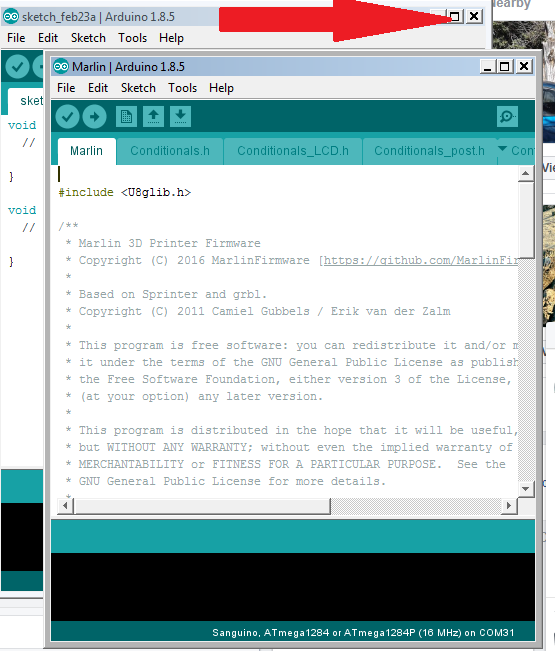
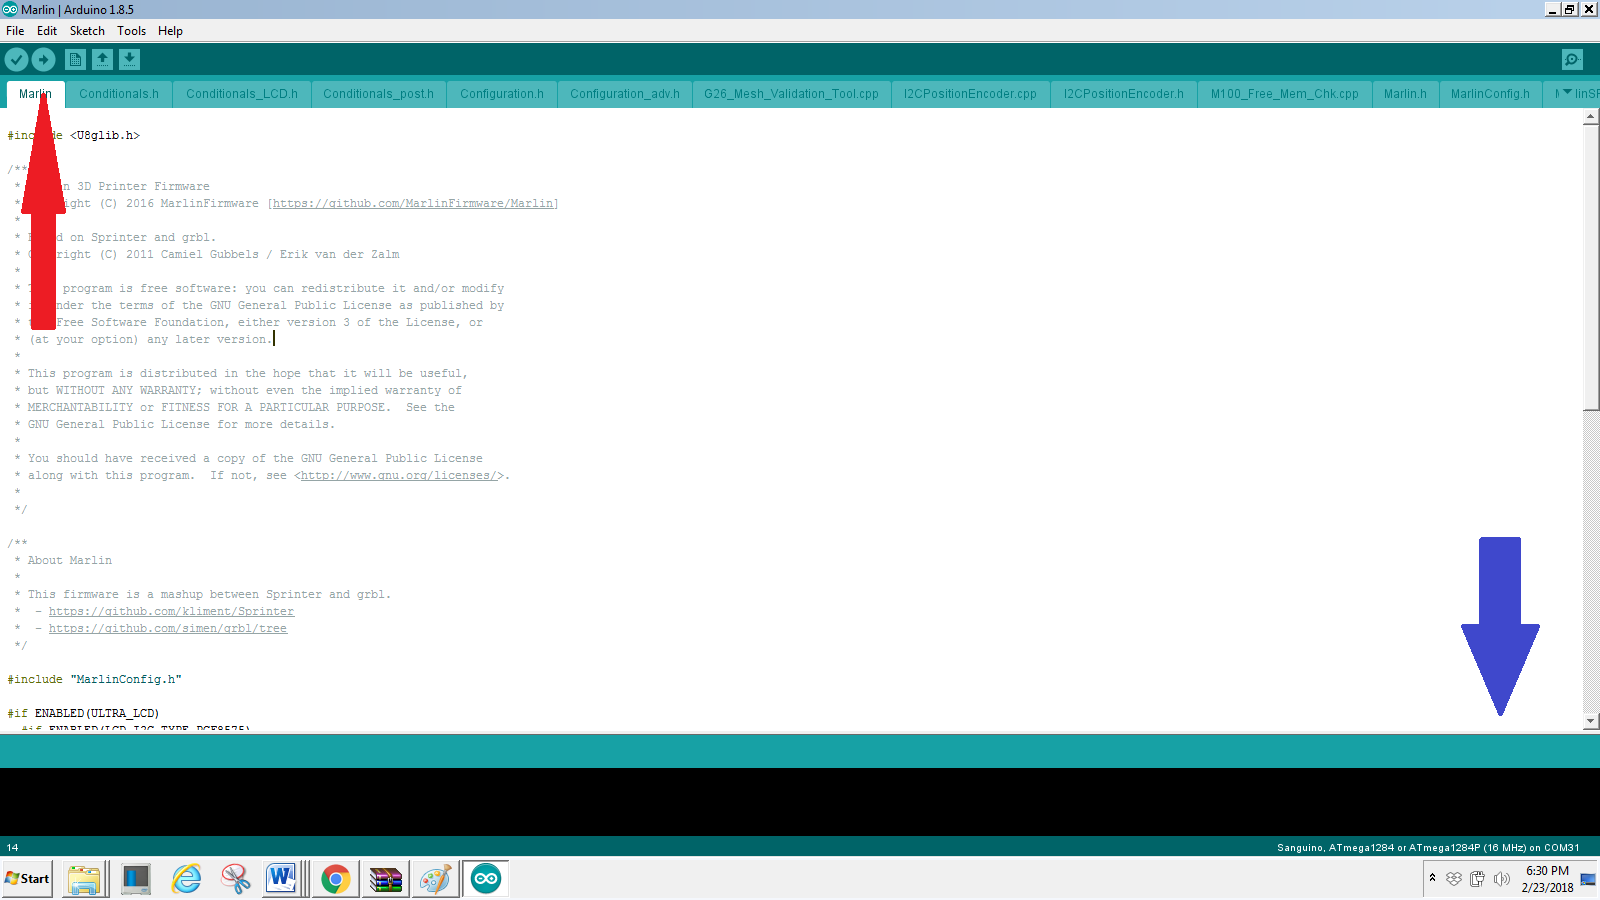
  1. Locate and open the file you saved, then run Arduino exe. See red arrow.


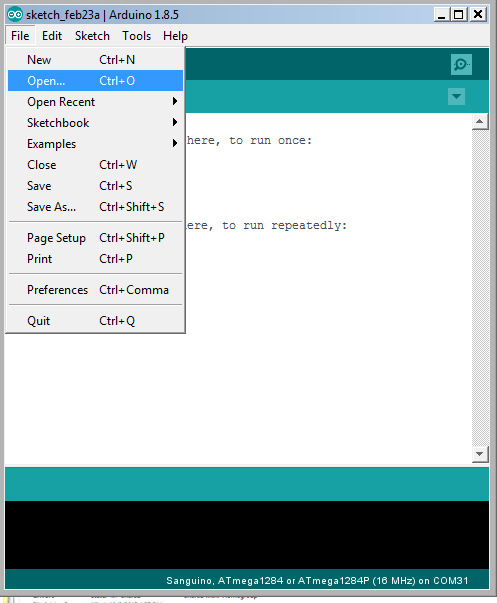
  1. Once Arduino loads open the marlin INO file for the X5S firmware.  (file/open/marlin/ X5S M1.1.8/marlin.ino ) To make this easier I limit the files I see to file type INO (see pic for detail).   If your running windows 10 you might have to find the file by going to  File/ open/ portable/ sketchbook/ marline/ X5s m1.1.8/ marlin.ino. click open Red arrow again


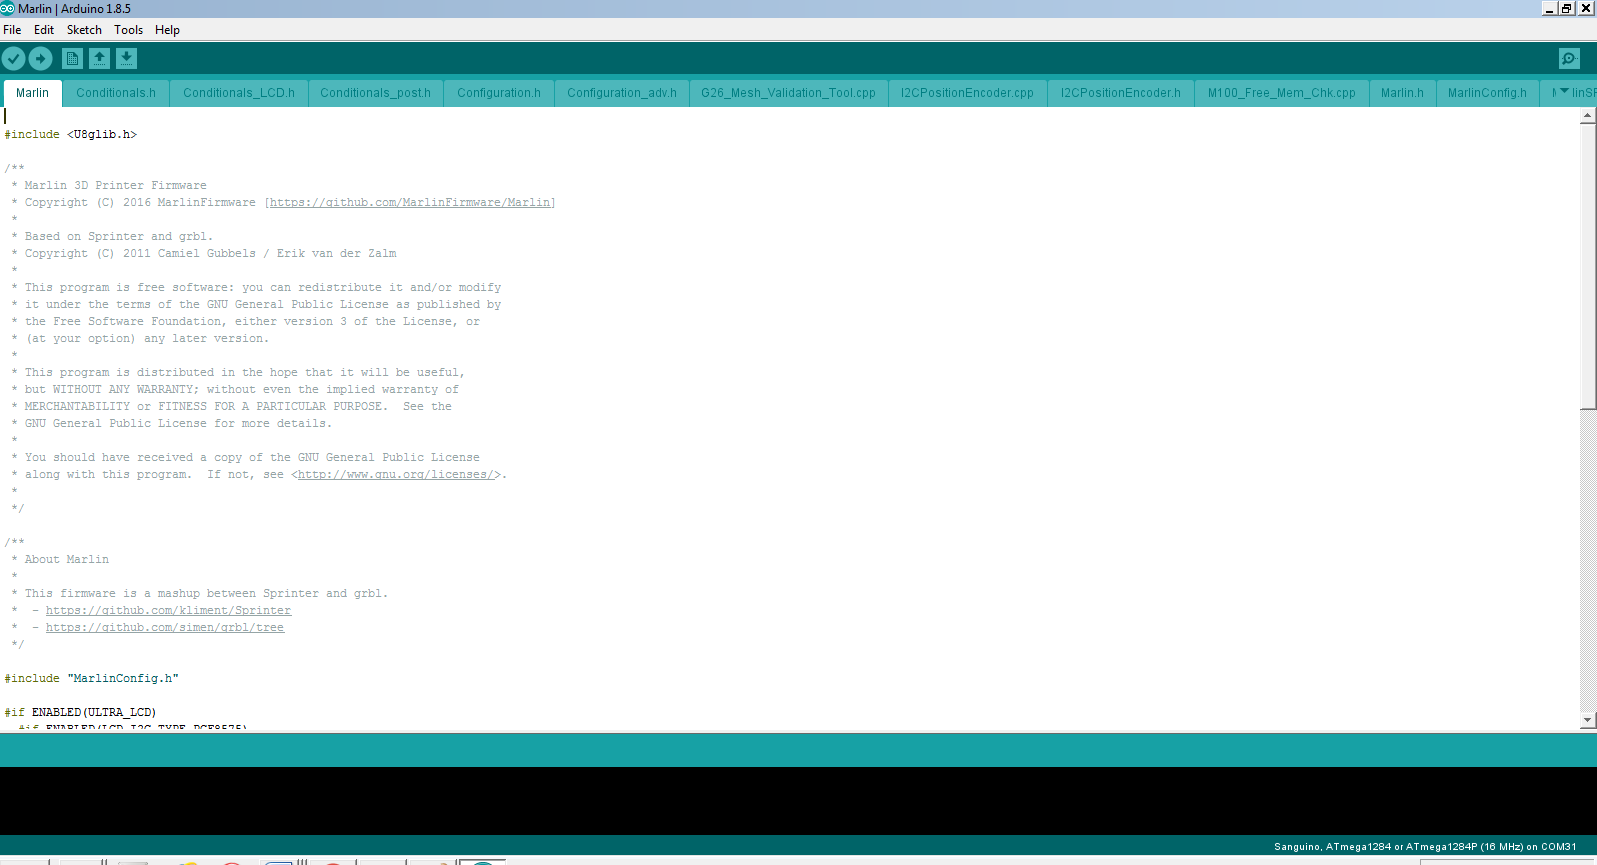
  1. Close first window of Aurduino, turn front one full screen.


  1. Plug in the USB cable and control board. The control board can be left fully installed in the printer just do not have the power on to it just in case. You might have to download and install drivers if windows does not install them on its own.

            Drivers can be downloaded here

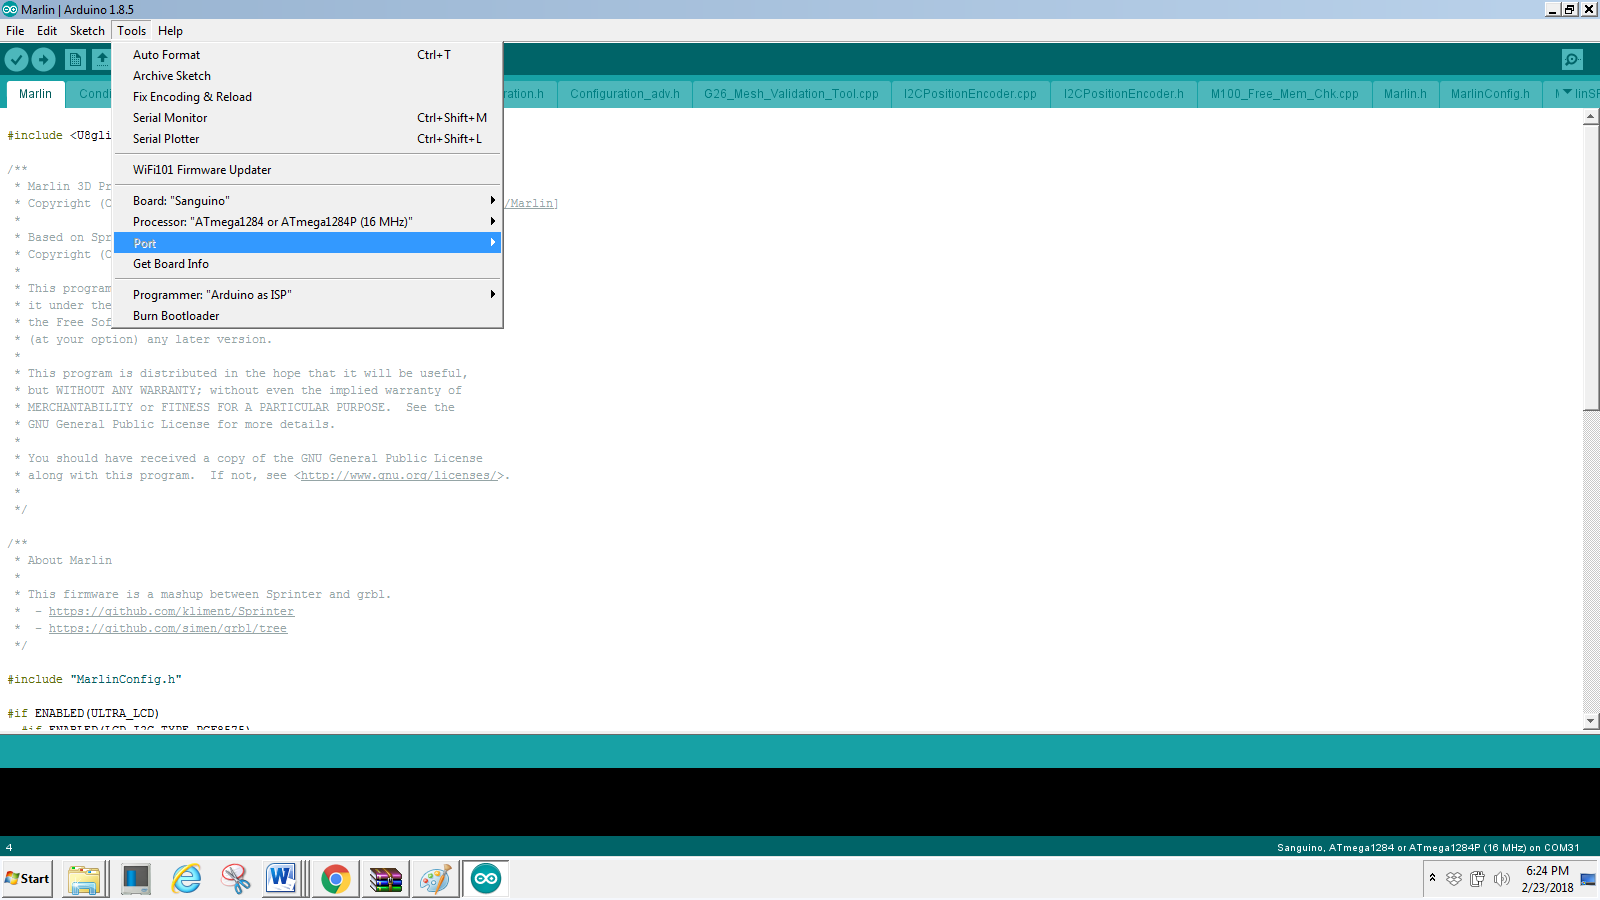
  1. Check make sure board is set to “Sanguino” and processor is set to “ATmega 1284 or ATmega1284P (16MHz)”  then Set the Port to the one that the control board it using.


  1. Upload the new firmware (red arrow)…..Wait for it to compile and then it will upload Blue arrow is where it will show compiling and uploading and complete.


    10. Enjoy


Thank you for reading and a big thanks to Alexander Ludwig for giving me his old factory board, because I had already added bootloader to mine.

How to Install a Post Processing Scripts in Cura 3...
Power Supply Fan Replacement

Related Posts


Comments 62

Scott Worthington on Thursday, 26 April 2018 19:19

I looked at it and the one I posted did have minor changes but they where only on the bed and from further testing I have figured out it tends to be the hotend more often so I did update the second file as well. So you can look at and try it... the changes are in the advance h tab.

I looked at it and the one I posted did have minor changes but they where only on the bed and from further testing I have figured out it tends to be the hotend more often so I did update the second file as well. So you can look at and try it... the changes are in the advance h tab.
Guest - Al on Thursday, 26 April 2018 19:49

Strange you did not see the files were the same. I did a diff checker comparison of all files from you original zip and updated one today and verified they were the same after looking through them myself and not seeing any changes. I rechecked the Configuration_adv.h previous fix zip (the one that was for downloaded before you just replaced it with the new one) and they show as identical. Here is a report: https://www.diffnow.com/?report=qf7s4

Thank you for the new file you uploaded today, as the changes are clear and seen right away. Here is the comparison of the changes in the new Configuration_adv.h from the firmware you uploaded today for others as well: https://www.diffnow.com/?report=pzhst

#define WATCH_TEMP_PERIOD 60 // Seconds

(From 20 to 60)
#define WATCH_TEMP_INCREASE 1 // Degrees Celsius

(From 2 to 1)

#define THERMAL_PROTECTION_BED_PERIOD 80 // Seconds

(From 20 to 60)
#define THERMAL_PROTECTION_BED_HYSTERESIS 1 // Degrees Celsius

(From 2 to 1)

#define WATCH_BED_TEMP_PERIOD 90 // Seconds

(From 60 to 90)
#define WATCH_BED_TEMP_INCREASE 1 // Degrees Celsius

(From 2 to 1)

P.S. I agree all of the issues I have seen related were from the extruder not the bed as you thought.

0
Strange you did not see the files were the same. I did a diff checker comparison of all files from you original zip and updated one today and verified they were the same after looking through them myself and not seeing any changes. I rechecked the Configuration_adv.h previous fix zip (the one that was for downloaded before you just replaced it with the new one) and they show as identical. Here is a report: https://www.diffnow.com/?report=qf7s4 Thank you for the new file you uploaded today, as the changes are clear and seen right away. Here is the comparison of the changes in the new Configuration_adv.h from the firmware you uploaded today for others as well: https://www.diffnow.com/?report=pzhst [quote]#define WATCH_TEMP_PERIOD 60 // Seconds[/quote] [b](From 20 to 60)[/b] [quote]#define WATCH_TEMP_INCREASE 1 // Degrees Celsius[/quote] [b](From 2 to 1)[/b] [quote] #define THERMAL_PROTECTION_BED_PERIOD 80 // Seconds[/quote] [b](From 20 to 60)[/b] [quote]#define THERMAL_PROTECTION_BED_HYSTERESIS 1 // Degrees Celsius[/quote] [b](From 2 to 1)[/b] [quote]#define WATCH_BED_TEMP_PERIOD 90 // Seconds[/quote] [b](From 60 to 90)[/b] [quote]#define WATCH_BED_TEMP_INCREASE 1 // Degrees Celsius[/quote] [b](From 2 to 1)[/b] P.S. I agree all of the issues I have seen related were from the extruder not the bed as you thought.
Scott Worthington on Thursday, 26 April 2018 20:01

Wonder why it shows no changes in the first version... odd I didn't download it again and check I just unzipped the file I have and looked at it... either way fixed... one day I might try some of the other options... lol

Wonder why it shows no changes in the first version... odd I didn't download it again and check I just unzipped the file I have and looked at it... either way fixed... one day I might try some of the other options... lol
Guest - Kratous on Tuesday, 17 July 2018 00:57

I get a Error compiling to board Arduino Mega Adk. I dont know which board it uses....
I'm new to the world, and only need to invert y direction....

I get a Error compiling to board Arduino Mega Adk. I dont know which board it uses.... I'm new to the world, and only need to invert y direction....
Scott Worthington on Tuesday, 17 July 2018 01:36

First try swapping x and y motor cables at the control board. More than likely fix the issue. And if you read these instructions they are for the factory board on the x5s and do not use anything but the USB cable to flash the firmware. For this to work you need to follow it step by step.

First try swapping x and y motor cables at the control board. More than likely fix the issue. And if you read these instructions they are for the factory board on the x5s and do not use anything but the USB cable to flash the firmware. For this to work you need to follow it step by step.
Guest - Kratous on Tuesday, 17 July 2018 07:24

Using ponterface I've deducted it's only the y, telling it to move x moved x only. But I'll be trying to flash and upload if I can figure that out...

Using ponterface I've deducted it's only the y, telling it to move x moved x only. But I'll be trying to flash and upload if I can figure that out...
Scott Worthington on Tuesday, 17 July 2018 12:17

Sounds like its using x3s firmware. The firmware on the article is for x5s so should work good.

Sounds like its using x3s firmware. The firmware on the article is for x5s so should work good.
Guest - Juan on Wednesday, 01 August 2018 19:56

Thank you for the post,

is there any way no know if the board is broken? It just stopped working.

Anyways, on win7 im having this message:

Arduino:1.8.5 (Windows 7), Tarjeta:"Sanguino, ATmega1284 or ATmega1284P (16 MHz)"

El Sketch usa 118944 bytes (91%) del espacio de almacenamiento de programa. El máximo es 130048 bytes.
Las variables Globales usan 4561 bytes (27%) de la memoria dinámica, dejando 11823 bytes para las variables locales. El máximo es 16384 bytes.
avrdude: stk500_recv(): programmer is not responding
avrdude: stk500_getsync() attempt 1 of 10: not in sync: resp=0x8b
avrdude: stk500_recv(): programmer is not responding
avrdude: stk500_getsync() attempt 2 of 10: not in sync: resp=0x8b
avrdude: stk500_recv(): programmer is not responding
avrdude: stk500_getsync() attempt 3 of 10: not in sync: resp=0x8b
avrdude: stk500_recv(): programmer is not responding
avrdude: stk500_getsync() attempt 4 of 10: not in sync: resp=0x8b
avrdude: stk500_recv(): programmer is not responding
avrdude: stk500_getsync() attempt 5 of 10: not in sync: resp=0x8b
avrdude: stk500_recv(): programmer is not responding
avrdude: stk500_getsync() attempt 6 of 10: not in sync: resp=0x8b
Problema subiendo a la placa. Visita http://www.arduino.cc/en/Guide/Troubleshooting#upload para sugerencias.
avrdude: stk500_recv(): programmer is not responding
avrdude: stk500_getsync() attempt 7 of 10: not in sync: resp=0x8b
avrdude: stk500_recv(): programmer is not responding
avrdude: stk500_getsync() attempt 8 of 10: not in sync: resp=0x8b
avrdude: stk500_recv(): programmer is not responding
avrdude: stk500_getsync() attempt 9 of 10: not in sync: resp=0x8b
avrdude: stk500_recv(): programmer is not responding
avrdude: stk500_getsync() attempt 10 of 10: not in sync: resp=0x8b

Thank you for the post, is there any way no know if the board is broken? It just stopped working. Anyways, on win7 im having this message: Arduino:1.8.5 (Windows 7), Tarjeta:"Sanguino, ATmega1284 or ATmega1284P (16 MHz)" El Sketch usa 118944 bytes (91%) del espacio de almacenamiento de programa. El máximo es 130048 bytes. Las variables Globales usan 4561 bytes (27%) de la memoria dinámica, dejando 11823 bytes para las variables locales. El máximo es 16384 bytes. avrdude: stk500_recv(): programmer is not responding avrdude: stk500_getsync() attempt 1 of 10: not in sync: resp=0x8b avrdude: stk500_recv(): programmer is not responding avrdude: stk500_getsync() attempt 2 of 10: not in sync: resp=0x8b avrdude: stk500_recv(): programmer is not responding avrdude: stk500_getsync() attempt 3 of 10: not in sync: resp=0x8b avrdude: stk500_recv(): programmer is not responding avrdude: stk500_getsync() attempt 4 of 10: not in sync: resp=0x8b avrdude: stk500_recv(): programmer is not responding avrdude: stk500_getsync() attempt 5 of 10: not in sync: resp=0x8b avrdude: stk500_recv(): programmer is not responding avrdude: stk500_getsync() attempt 6 of 10: not in sync: resp=0x8b Problema subiendo a la placa. Visita http://www.arduino.cc/en/Guide/Troubleshooting#upload para sugerencias. avrdude: stk500_recv(): programmer is not responding avrdude: stk500_getsync() attempt 7 of 10: not in sync: resp=0x8b avrdude: stk500_recv(): programmer is not responding avrdude: stk500_getsync() attempt 8 of 10: not in sync: resp=0x8b avrdude: stk500_recv(): programmer is not responding avrdude: stk500_getsync() attempt 9 of 10: not in sync: resp=0x8b avrdude: stk500_recv(): programmer is not responding avrdude: stk500_getsync() attempt 10 of 10: not in sync: resp=0x8b
Guest - adrian cattell on Sunday, 11 November 2018 05:34

May I ask can this be used to flash the Tronxy X5 (Not the S) the board numbers are the same... Kind regards Adrian.

May I ask can this be used to flash the Tronxy X5 (Not the S) the board numbers are the same... Kind regards Adrian.
Scott Worthington on Sunday, 11 November 2018 05:42

Yes it can but the firmware would need a few changes like the printer type would need changed to cartesian then the y steps might need changed and max travel for each axis would need fixed rest should be the same.

Yes it can but the firmware would need a few changes like the printer type would need changed to cartesian then the y steps might need changed and max travel for each axis would need fixed rest should be the same.
Paul Isabelle on Wednesday, 27 February 2019 17:29

Thank you Scott.

The firmware flashed as simple as 1-2-3 and works like a charm. FANTASTIC! Thanks from us all out here with no support in DIY Land.

I have a question though. I see there is a really nice little routine for manual bed leveling. Unfortunately, I have a 300x300 Anycubic Ultraglass and I would need to bring those adjustment points in just a bit. Where are those parameters to be found in the sketch?

I purchased a 3D Touch Probe, perhaps a bit fast. From what I understand, the X5S board does not have a pinout for the pin servo. I see that MESH LEVELING is available in MARLIN 1.1.8 and would like to get all that working too.

There appears to be a breakout board on EBAY to access pin_27 from the display ribbon for the pin servo. Nice. (https://www.ebay.com/itm/192819925719)
It costs more than the probe itself, not mentioning the shipping which doubles that, making it less attractive. The breakout board description mentions that it avoids cutting ribbon connector wires and soldering which I have no problem doing. Anyone have any information about that option and advise not to fry anything? I have second X5S board just in case.

Thank you Scott. The firmware flashed as simple as 1-2-3 and works like a charm. FANTASTIC! [i]Thanks from us all out here with no support in DIY Land.[/i] I have a question though. I see there is a really nice little routine for manual bed leveling. Unfortunately, I have a 300x300 Anycubic Ultraglass and I would need to bring those adjustment points in just a bit. [i]Where are those parameters to be found in the sketch?[/i] I purchased a [b]3D Touch Probe[/b], [i]perhaps a bit fast.[/i] From what I understand, the X5S board does not have a pinout for the pin servo. I see that MESH LEVELING is available in MARLIN 1.1.8 and would like to get all that working too. There appears to be a breakout board on EBAY to access pin_27 from the display ribbon for the pin servo. Nice. (https://www.ebay.com/itm/192819925719) It costs more than the probe itself, not mentioning the shipping which doubles that, making it less attractive. The breakout board description mentions that it avoids cutting ribbon connector wires and soldering which I have no problem doing. Anyone have any information about that option and advise not to fry anything? I have second X5S board just in case.
Scott Worthington on Wednesday, 27 February 2019 17:37

Thanks for the comments. As far as the abl stuff honestly no real experience with it as it's the first thing I remove when I built the printers... I believe in the config.h or advconfig.h file you can find the grid layout. As far as pin 27 you can also solder on the board from what I have read and one person I have talked to has claimed he has been able to pull the pin out of the 6 pin connector used for flashing the board as well but like I mentioned I have never done it. So I cant say for sure on any of it.

Thanks for the comments. As far as the abl stuff honestly no real experience with it as it's the first thing I remove when I built the printers... I believe in the config.h or advconfig.h file you can find the grid layout. As far as pin 27 you can also solder on the board from what I have read and one person I have talked to has claimed he has been able to pull the pin out of the 6 pin connector used for flashing the board as well but like I mentioned I have never done it. So I cant say for sure on any of it.
Paul Isabelle on Wednesday, 27 February 2019 18:04

Thanks Scott,

I will look in the advconfig.h file and closer at the config.h

I guess I need to experiment with this

  • I will look at the display configuration and see what pins are used for the display. I presume pin_27 is not, hence the available breakout board.
  • Since we can flash from USB now, the pins used for flashing can be freed up. Coolio! I presume that any pin not used by Marlin can be used for this.

  • If I get positive results, I will be pleased to share.

    Paul.

    Thanks Scott, I will look in the advconfig.h file and closer at the config.h I guess I need to experiment with this [*] I will look at the display configuration and see what pins are used for the display. I presume pin_27 is not, hence the available breakout board. [*] Since we can flash from USB now, the pins used for flashing can be freed up. Coolio! I presume that any pin not used by Marlin can be used for this. If I get positive results, I will be pleased to share. Paul.
    Guest - Levi on Thursday, 21 March 2019 14:00

    Hello,
    I have followed you guide multiple times and I have got the same error every time

    Arduino: 1.8.5 (Windows 7), Board: "Sanguino, ATmega1284 or ATmega1284P (16 MHz)"

    Archiving built core (caching) in: C:\Users\EEE\AppData\Local\Temp\arduino_cache_527674\core\core_Lauszus-Sanguino-360282f_avr_sanguino_cpu_atmega1284p_993e186d72700c25c40780823faea018.a
    Sketch uses 118926 bytes (91%) of program storage space. Maximum is 130048 bytes.
    Global variables use 4561 bytes (27%) of dynamic memory, leaving 11823 bytes for local variables. Maximum is 16384 bytes.
    avrdude: stk500_recv(): programmer is not responding
    avrdude: stk500_getsync() attempt 1 of 10: not in sync: resp=0xa1
    avrdude: stk500_recv(): programmer is not responding
    avrdude: stk500_getsync() attempt 2 of 10: not in sync: resp=0xa1
    avrdude: stk500_recv(): programmer is not responding
    avrdude: stk500_getsync() attempt 3 of 10: not in sync: resp=0xa1
    avrdude: stk500_recv(): programmer is not responding
    avrdude: stk500_getsync() attempt 4 of 10: not in sync: resp=0xa1
    avrdude: stk500_recv(): programmer is not responding
    avrdude: stk500_getsync() attempt 5 of 10: not in sync: resp=0xa1
    avrdude: stk500_recv(): programmer is not responding
    avrdude: stk500_getsync() attempt 6 of 10: not in sync: resp=0xa1
    avrdude: stk500_recv(): programmer is not responding
    avrdude: stk500_getsync() attempt 7 of 10: not in sync: resp=0xa1
    avrdude: stk500_recv(): programmer is not responding
    avrdude: stk500_getsync() attempt 8 of 10: not in sync: resp=0xa1
    avrdude: stk500_recv(): programmer is not responding
    Problem uploading to board. See http://www.arduino.cc/en/Guide/Troubleshooting#upload for suggestions.
    avrdude: stk500_getsync() attempt 9 of 10: not in sync: resp=0xa1
    avrdude: stk500_recv(): programmer is not responding
    avrdude: stk500_getsync() attempt 10 of 10: not in sync: resp=0xa1

    This report would have more information with
    "Show verbose output during compilation"
    option enabled in File -> Preferences.

    Does anyone know the fix to this error?
    Thanks!

    Hello, I have followed you guide multiple times and I have got the same error every time Arduino: 1.8.5 (Windows 7), Board: "Sanguino, ATmega1284 or ATmega1284P (16 MHz)" Archiving built core (caching) in: C:\Users\EEE\AppData\Local\Temp\arduino_cache_527674\core\core_Lauszus-Sanguino-360282f_avr_sanguino_cpu_atmega1284p_993e186d72700c25c40780823faea018.a Sketch uses 118926 bytes (91%) of program storage space. Maximum is 130048 bytes. Global variables use 4561 bytes (27%) of dynamic memory, leaving 11823 bytes for local variables. Maximum is 16384 bytes. avrdude: stk500_recv(): programmer is not responding avrdude: stk500_getsync() attempt 1 of 10: not in sync: resp=0xa1 avrdude: stk500_recv(): programmer is not responding avrdude: stk500_getsync() attempt 2 of 10: not in sync: resp=0xa1 avrdude: stk500_recv(): programmer is not responding avrdude: stk500_getsync() attempt 3 of 10: not in sync: resp=0xa1 avrdude: stk500_recv(): programmer is not responding avrdude: stk500_getsync() attempt 4 of 10: not in sync: resp=0xa1 avrdude: stk500_recv(): programmer is not responding avrdude: stk500_getsync() attempt 5 of 10: not in sync: resp=0xa1 avrdude: stk500_recv(): programmer is not responding avrdude: stk500_getsync() attempt 6 of 10: not in sync: resp=0xa1 avrdude: stk500_recv(): programmer is not responding avrdude: stk500_getsync() attempt 7 of 10: not in sync: resp=0xa1 avrdude: stk500_recv(): programmer is not responding avrdude: stk500_getsync() attempt 8 of 10: not in sync: resp=0xa1 avrdude: stk500_recv(): programmer is not responding Problem uploading to board. See http://www.arduino.cc/en/Guide/Troubleshooting#upload for suggestions. avrdude: stk500_getsync() attempt 9 of 10: not in sync: resp=0xa1 avrdude: stk500_recv(): programmer is not responding avrdude: stk500_getsync() attempt 10 of 10: not in sync: resp=0xa1 This report would have more information with "Show verbose output during compilation" option enabled in File -> Preferences. Does anyone know the fix to this error? Thanks!
    Guest - dmcland on Saturday, 06 April 2019 23:39

    Scott,
    have you looked at doing 1.9.1 ?

    I would be interested in moving to this code too.

    Also,
    I have to lower acceleration & Jerk to get straighter walls instead of stepped walls.

    New settings,

    define DEFAULT_ACCELERATION 1000 // X, Y, Z and E acceleration for printing moves
    define DEFAULT_RETRACT_ACCELERATION 1000 // E acceleration for retracts
    define DEFAULT_TRAVEL_ACCELERATION 1000 // X, Y, Z acceleration for travel (non printing) moves
    define DEFAULT_XJERK 20.0
    define DEFAULT_YJERK 20.0
    define DEFAULT_ZJERK 0.4

    Just an FYI

    Darrin

    Scott, have you looked at doing 1.9.1 ? I would be interested in moving to this code too. Also, I have to lower acceleration & Jerk to get straighter walls instead of stepped walls. New settings, define DEFAULT_ACCELERATION 1000 // X, Y, Z and E acceleration for printing moves define DEFAULT_RETRACT_ACCELERATION 1000 // E acceleration for retracts define DEFAULT_TRAVEL_ACCELERATION 1000 // X, Y, Z acceleration for travel (non printing) moves define DEFAULT_XJERK 20.0 define DEFAULT_YJERK 20.0 define DEFAULT_ZJERK 0.4 Just an FYI Darrin
    Scott Worthington on Sunday, 07 April 2019 00:18

    So you put jerk and acceleration back to factory you will have rounded corners and ringing. If your walls are not straight with the firmware I uploaded then you more than likely have other things causing it like loose parts.

    I do not plan o going to 1.1.9 there are to many issues with it and any newer firmware right now.

    So you put jerk and acceleration back to factory you will have rounded corners and ringing. If your walls are not straight with the firmware I uploaded then you more than likely have other things causing it like loose parts. I do not plan o going to 1.1.9 there are to many issues with it and any newer firmware right now.
    Guest - drmcland on Sunday, 07 April 2019 00:47

    Thank you for the quick reply,

    I believe you may be right, there is a lot of slack in the carriage assembly. Do you have a recommended carriage assembly I should download and print?

    I the printer is new so Im not thinking worn wheels, but rath not stug to the 20/20 rail

    thoughts?

    Darrin

    Thank you for the quick reply, I believe you may be right, there is a lot of slack in the carriage assembly. Do you have a recommended carriage assembly I should download and print? I the printer is new so Im not thinking worn wheels, but rath not stug to the 20/20 rail thoughts? Darrin
    Scott Worthington on Sunday, 07 April 2019 02:47

    All you need to do is loosen the bolts holding the wheels in place then squeeze them inwards on the extrusion then tighten it all up again. That should take the extra room up

    All you need to do is loosen the bolts holding the wheels in place then squeeze them inwards on the extrusion then tighten it all up again. That should take the extra room up
    Guest - Jake on Monday, 22 April 2019 21:56

    Hey there Scott,

    Do you have a version of this particular Arduino IDE compatible with Mac? I don't have a windows machine.

    Hey there Scott, Do you have a version of this particular Arduino IDE compatible with Mac? I don't have a windows machine.
    Scott Worthington on Tuesday, 23 April 2019 00:12

    I do not know of one I don't have a mac so I couldn't even do a version if I wanted to...LOL but you might be able to try windows compatibility mode or what ever they call it that allows you to run windows programs... (I know they used to have it anyway...LOL)

    I do not know of one I don't have a mac so I couldn't even do a version if I wanted to...LOL but you might be able to try windows compatibility mode or what ever they call it that allows you to run windows programs... (I know they used to have it anyway...LOL)
    Already Registered? Login Here
    Guest
    Friday, 29 March 2024

    To keep the site live and make improvements Please consider Donating. Thank you for your donation.